SmarTrak is DSSR’s helper that steps in to guide your scope when the guide taget is lost due to cloud or other obstructions. I seem to have broken it in DSSR5 and I have added some logging features to help me fix it. These can also give you an insight into how DSSR is controlling your scope.
When DSSR loses the guide target it logs the guiding history like so:
08:22:17.838 Target lost – SmartTracking
08:22:17.839 SmartTrak totalTms:4638563 ppmsH:-0.01001258 intH:-49937.2 pH:-500.0 ppmsV:-0.03671094 intV:-13619.9 pV:-500.0
08:22:17.839 ,0001,6834,0,0
08:22:17.839 ,0002,7170,51,305
08:22:17.839 ,0003,7668,103,508
08:22:17.839 ,0004,8266,155,711
08:22:17.839 ,0005,8662,-310,-1322
08:22:17.839 ,0006,65300,-310,-1220….. etc for all stored guide history points.
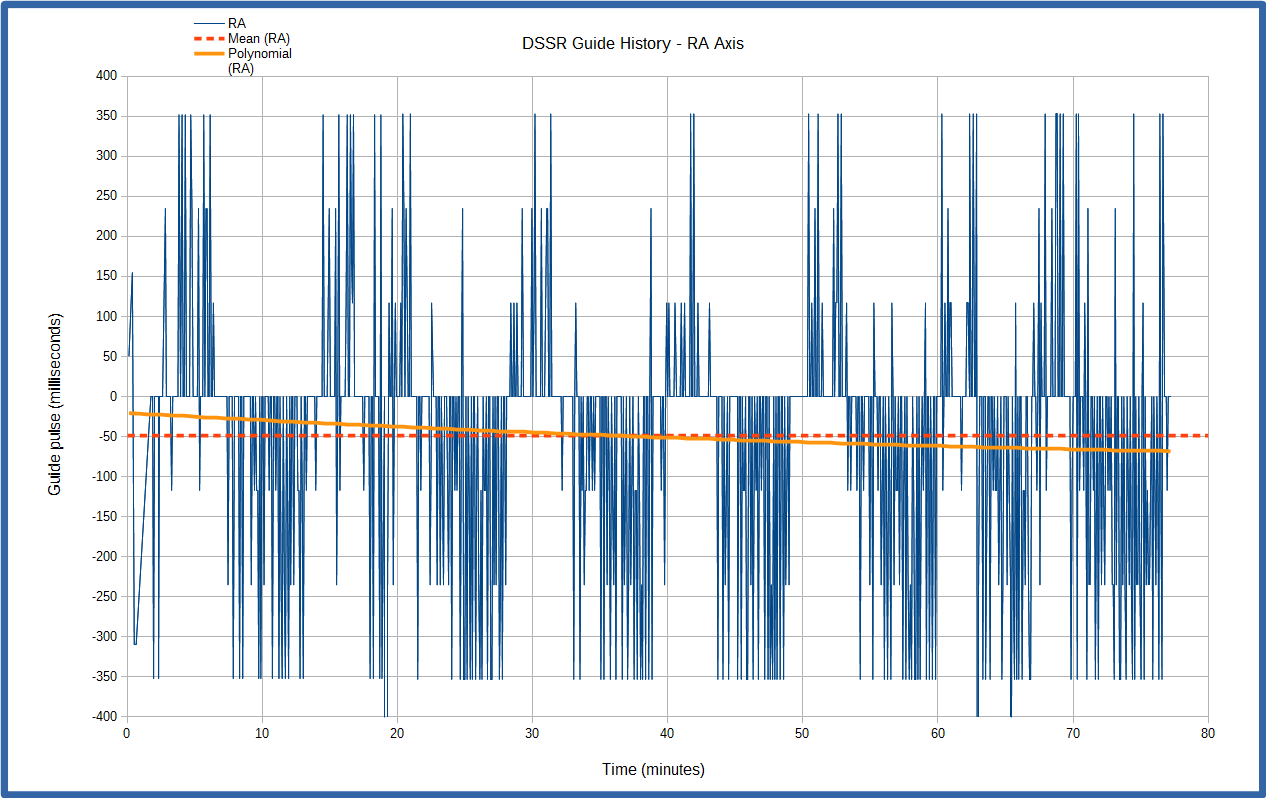
Each red line contains the log time, point index, time in milliseconds since the last guide pulse and the pulse times in milliseconds for the RA and declination axes. You can copy and paste these points into a spreadsheet and chart the guide pulses in each axis against time. Below is the RA chart for one of my sessions.

Click for full image
This shows the plus or minus RA guide pulses have a recurring period of about 10 minutes. I don’t use periodic error correction on my HEQ5 Pro but this chart shows that I probably should. When I play back my session videos I can clearly see the target moving back and forward in RA around a mean position during SmartTraking.
SmartTrak applies the mean pulse (-50ms red dotted line) but you can see that the polynomial trend line runs from -20ms at 78 minutes ago to -70ms when SmartTrak kicked in at right on the chart. This suggests that I need to cut my number of history points down to cover say just 2 cycles or 20 minutes. This will give a better mean pulse time for SmartTrak to use.
The fact that the mean line is not at 0ms suggests that my mount still has an alignment error. You can see a similar alignment error in the declination chart below.
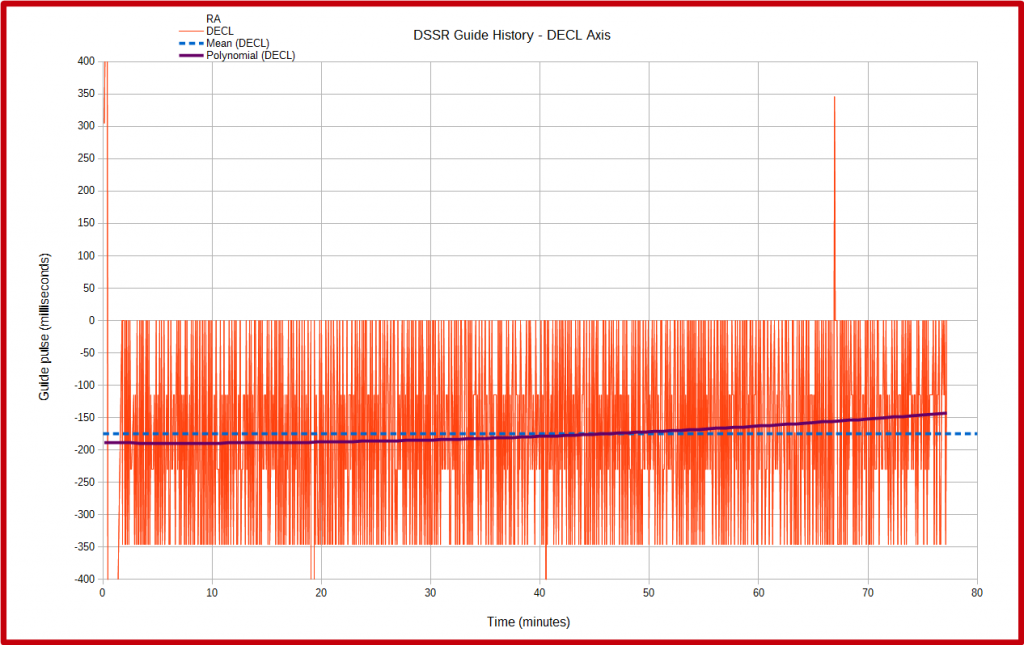
Click for full image
This shows that all the guide pulses are negative and there seems to be a much shorter periodic error. The mean pulse is -175ms but the polynomial trend is at -150ms when SmarTrak kicks in at right. Again this suggests that fewer history points are needed to give a more accurate mean value.
The above charts have been very useful to help me see what DSSR is doing during autoguiding and I hope to have SmartTrak fully operational soon.
You can try this out for yourself by changing your screenshot interval to 5 seconds, turning on logging, checking the SmartTrak box and then guiding for an hour say. Then raise the minimum guide similarity to 999 to force SmartTrak to kick in and leave it running until the target leaves the field of view. Make a session video as per Appendix E of the manual and scrub it back and forward in VirtualDub to see how SmartTrak is faring.
You can then use a spreadsheet to construct the charts above. I used the free LibreOffice Calc spreadsheet for mine.