Horsehead by Remote Control

 Deep Sky  Comments Off on Horsehead by Remote Control
Feb 062018
 

Above  is a trial I shot of the Horsehead Nebula using iTelescope.net which has a range of high spec remote controlled telescopes across the world. I bought 20 imaging points using their starter plan which was made up to 60 points as a new member. I then booked 45 minutes on their telescope #24 which is a 0.61 metre reflector in California. I shot 300s each of Ha, R,G,B, O and S and combined the HaRGB in Krita.

This shooting plan took 47 of my points which I think is really good value for using a scope I could never hope to own.

Note that the image is pretty noisy because I did not have enough images to stack and reduce the noise. I will be taking more shots soon and will post the results here.

 Posted by at 11:56 am

M42 Guided by DSSR

 Deep Sky  Comments Off on M42 Guided by DSSR
Feb 282017
 

Here is my latest M42 captured with my Canon 1100D thru my Nexstar 4SE at prime. I used an old 3″ Mak to guide but found the usual star guiding apps could not lock on the stars. I then switched on DSSR and used it to guide right thru the 3 hour session. Stacked in SkippyStak and processed in StarTools.

Click for full size image

 Posted by at 1:03 pm

M42 using Nexstar 4SE

 Deep Sky  Comments Off on M42 using Nexstar 4SE
Feb 112017
 

This was shot with my Canon 1100D looking thru my Nexstar 4SE at prime. Stacked in SkippyStak and processed in StarTools.

Click for full image

 Posted by at 8:20 pm

Easy Peasy Horizon to Horizon Milky Way Mosaic

 Deep Sky, Tutorials  Comments Off on Easy Peasy Horizon to Horizon Milky Way Mosaic
Oct 092015
 

I have always admired the fantastic Milky Way mosaics that you see on the web and here is how to try it for yourself.

milky way

Click for HD version. Original mosaic was 11,440 x 2,800 pixels.

Field Work

I shot this in Scotland in October using only a fixed tripod and a Canon 1100D with the stock 18-55mm lens. At this time of year, the Milky Way passes close to the zenith which makes this method easy to use. You could adapt it for other dates by tilting your tripod head so that it follows the Milky Way as you tilt the camera.

First, get to a dark site with clear views of the Milky Way from horizon to horizon. Set your tripod level and take some test shots to test focus and exposure. I set the lens to 18mm, wide open aperture, ISO 6400 and exposure to manual at 30sec.

Now aim at where the Milky Way crosses one horizon and take your first shot. Tilt the camera up about 15 degrees and take another shot. Repeat until the camera is pointing straight up which should give you a series of 7 shots or thereabouts. (The angle is not too important – you just need a good overlap between shots. Now turn your camera round to the other horizon and repeat for a second series.

Shooting all the images took me about 10 minutes.

Create the Mosaic

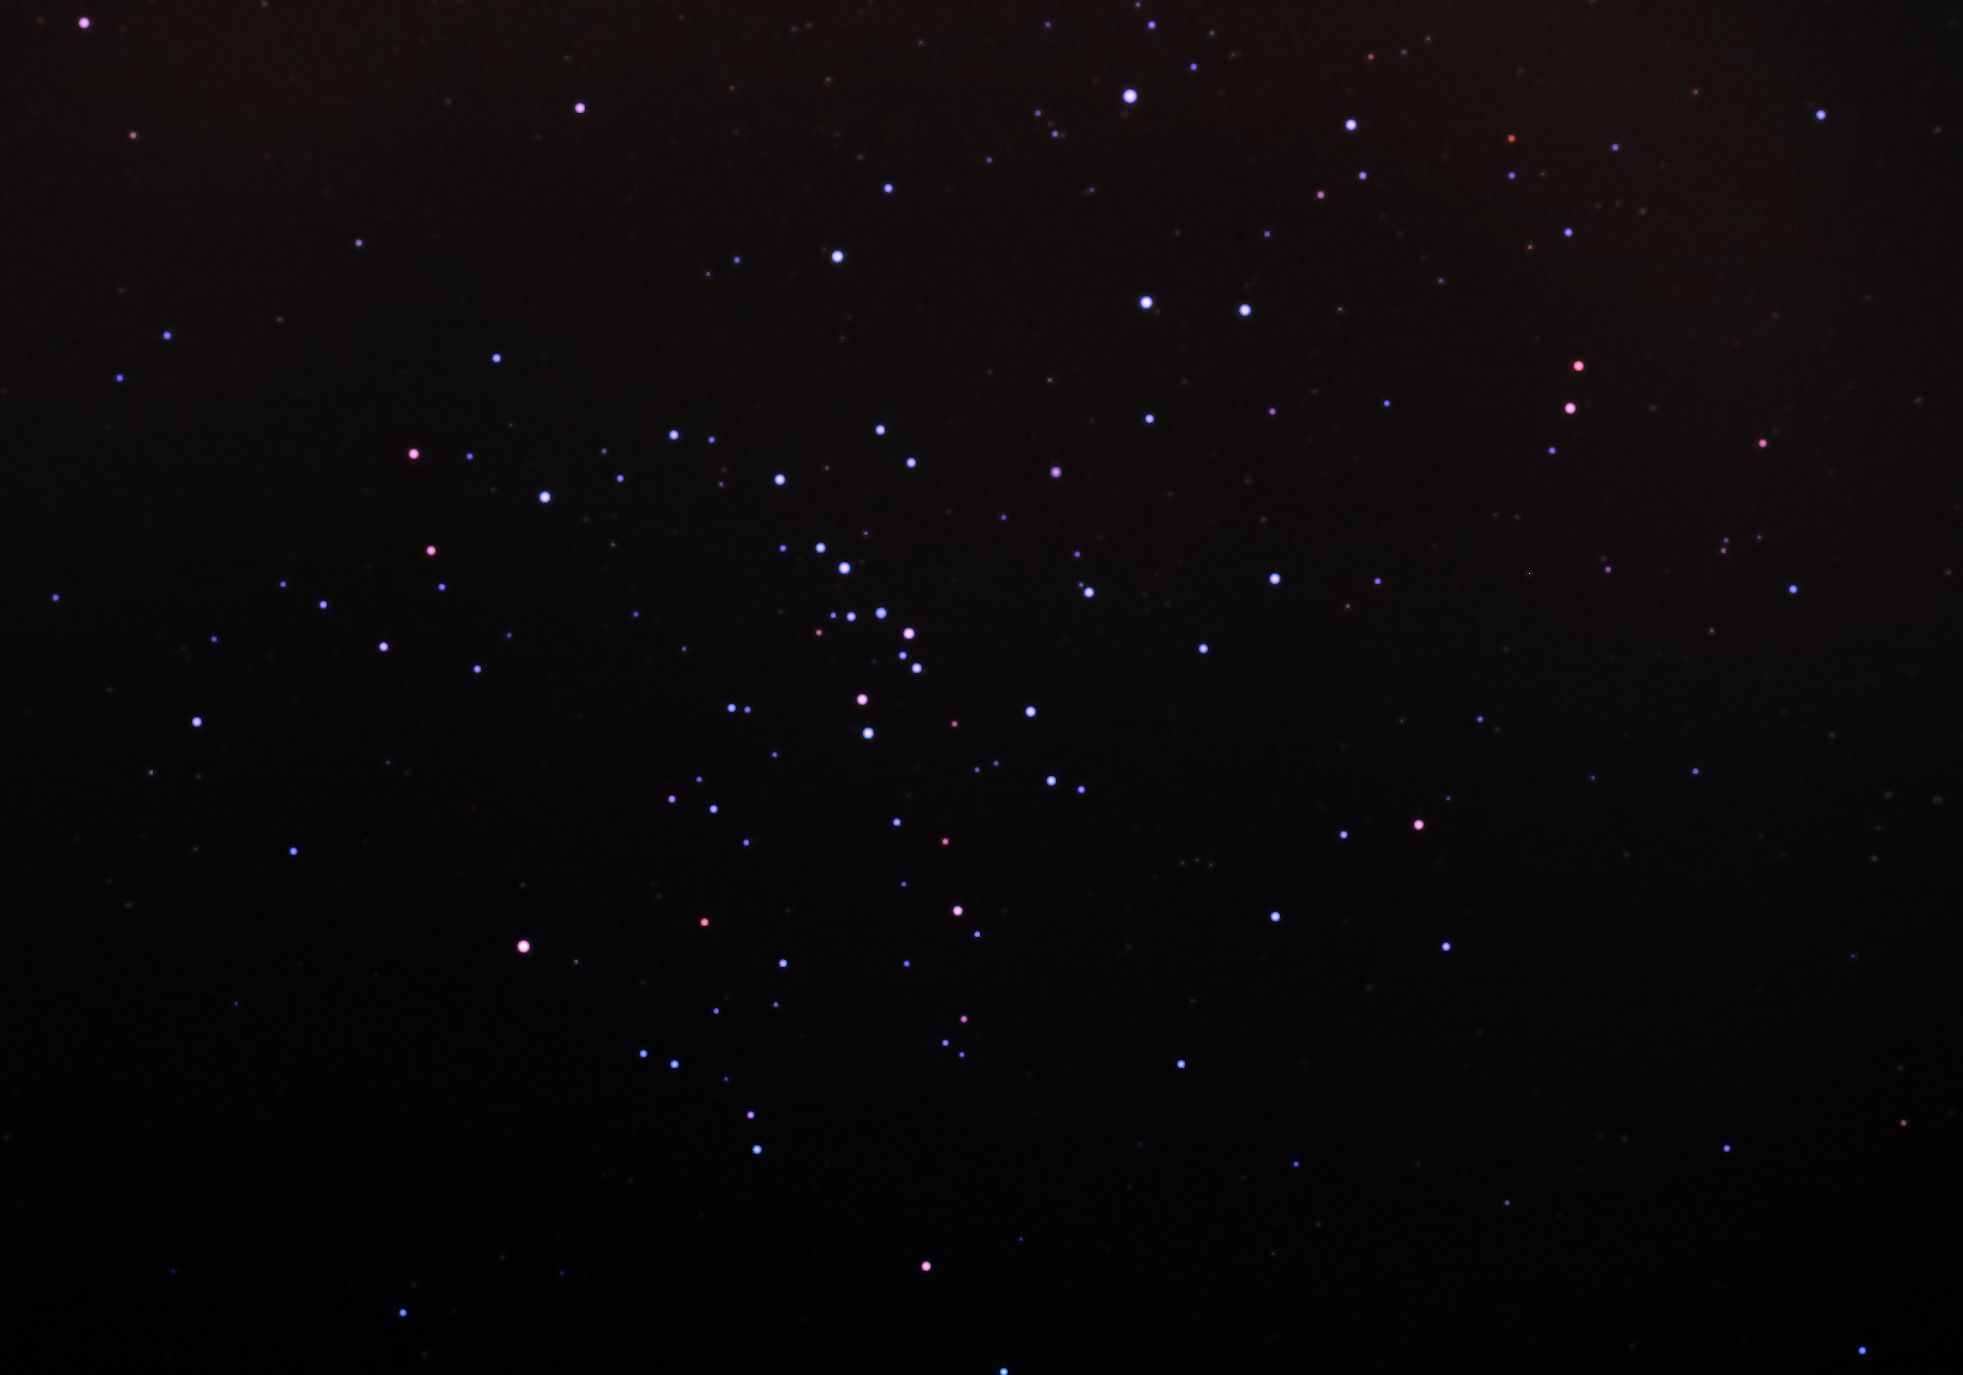
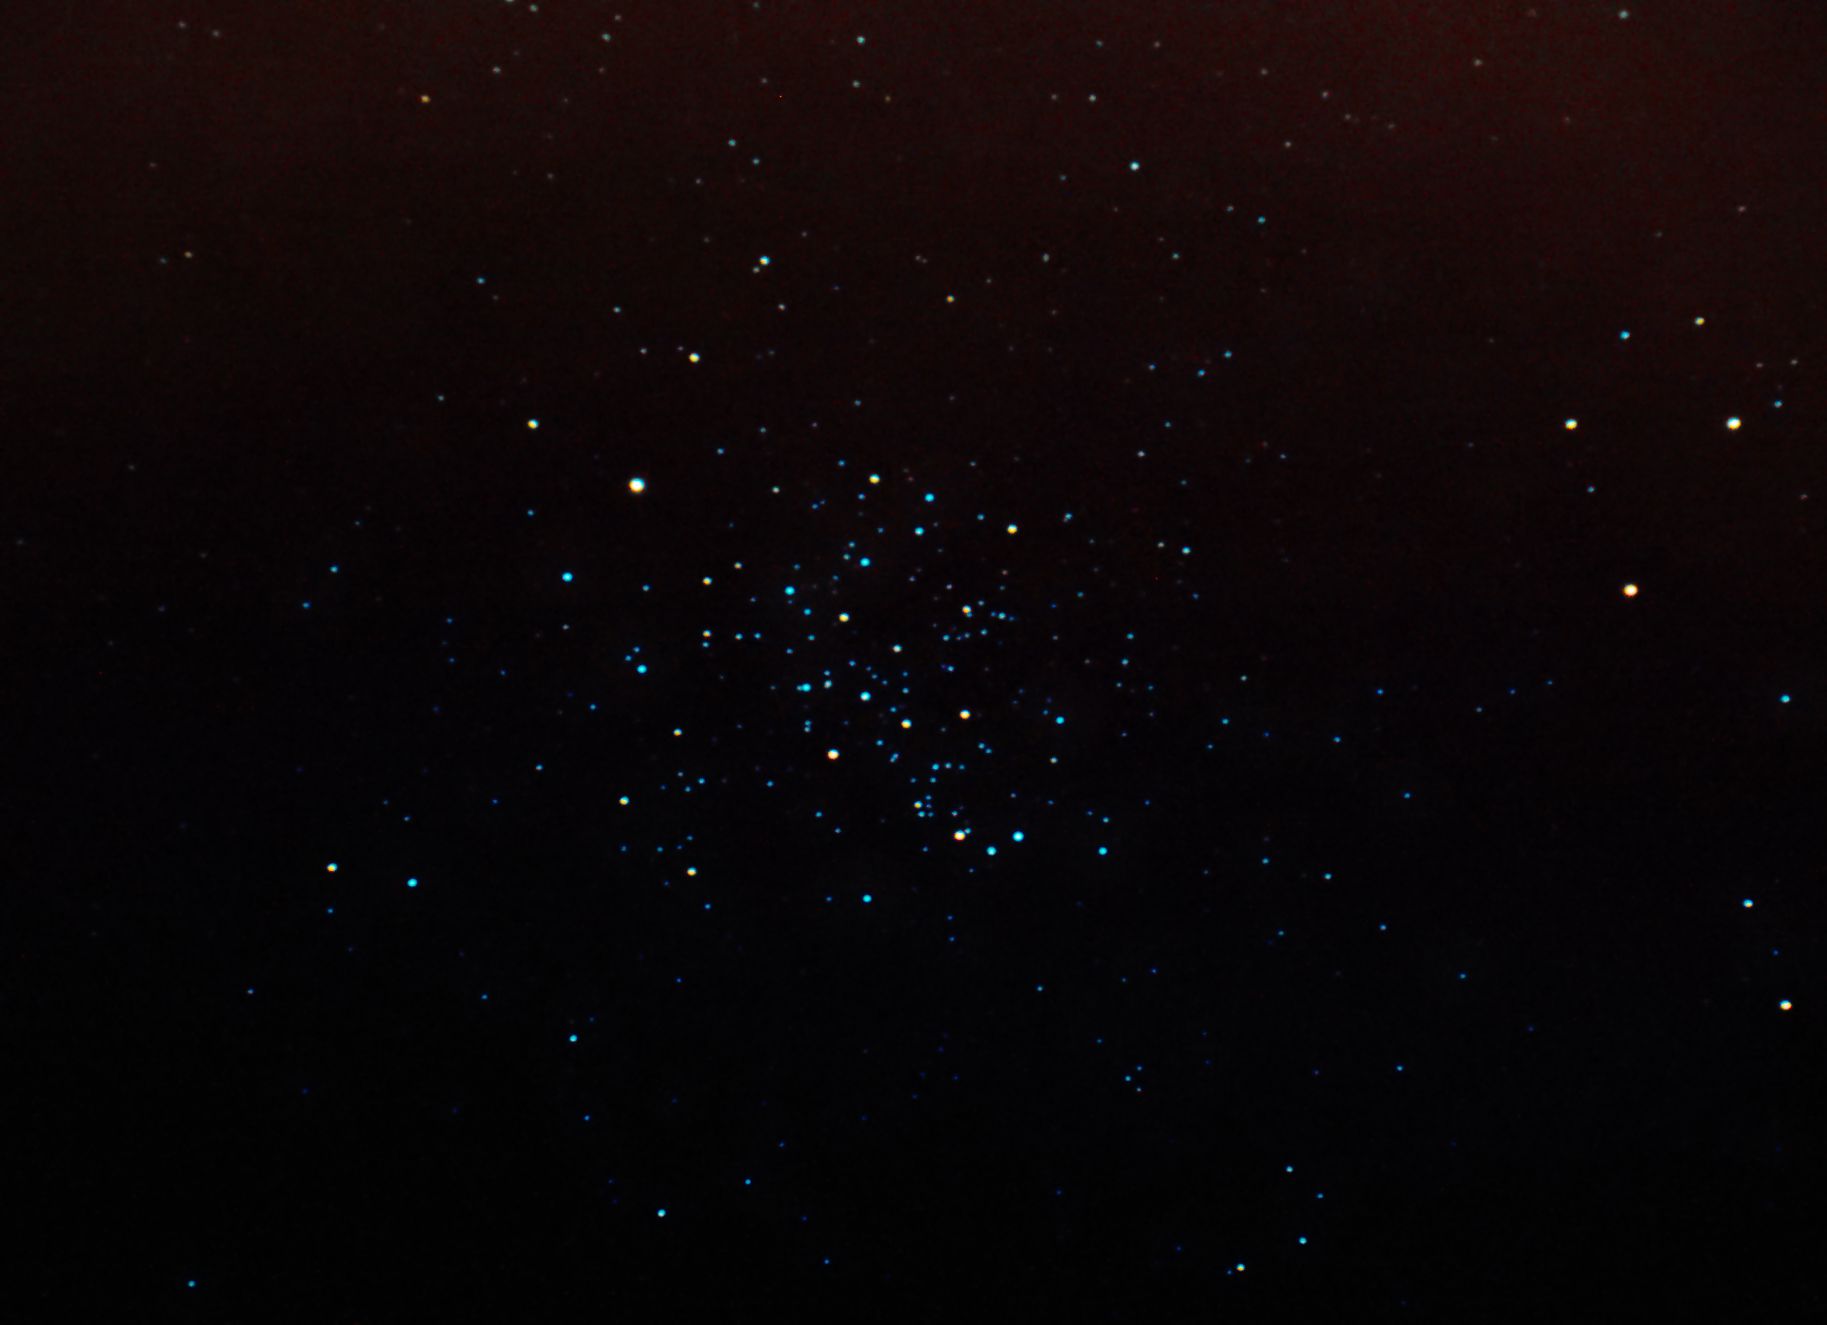
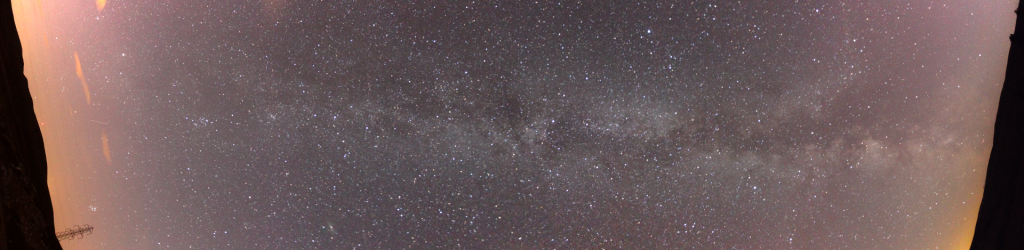
I used the amazing and free Microsoft Image Composite Editor (ICE) to stitch the mosaic. Start by loading the first series of images (I used the raw .cr2 files). Then click Stitch and select the Transverse Mercator projection when it has finished stitching. Click Crop and then No crop and then click Export and select the .PNG image file option. Click Export to disk and select where to save your first half of the Milky Way. Repeat for the second series of images which will give you 2 mosaic halves like these.

IMG_5498_stitch no crop

IMG_5491_stitch no crop

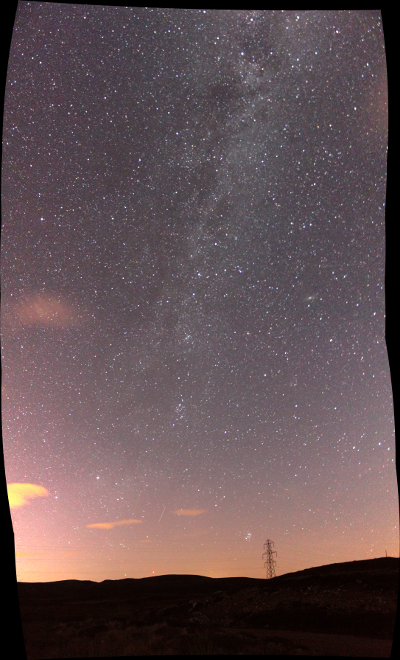
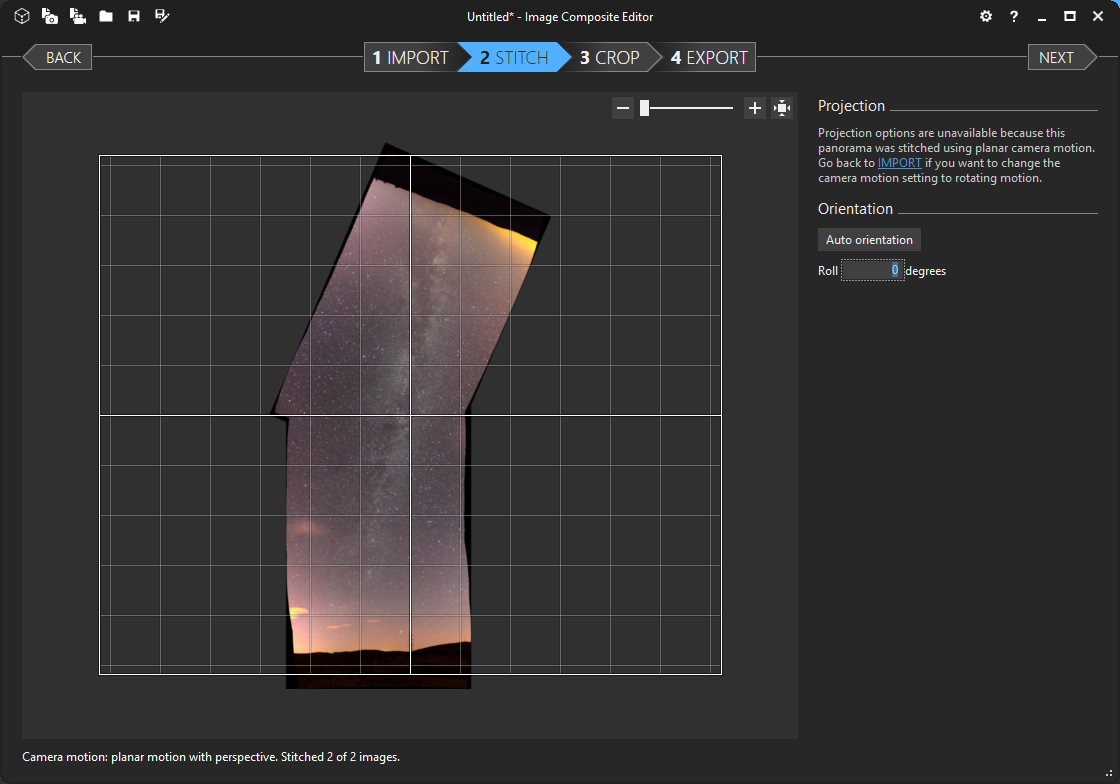
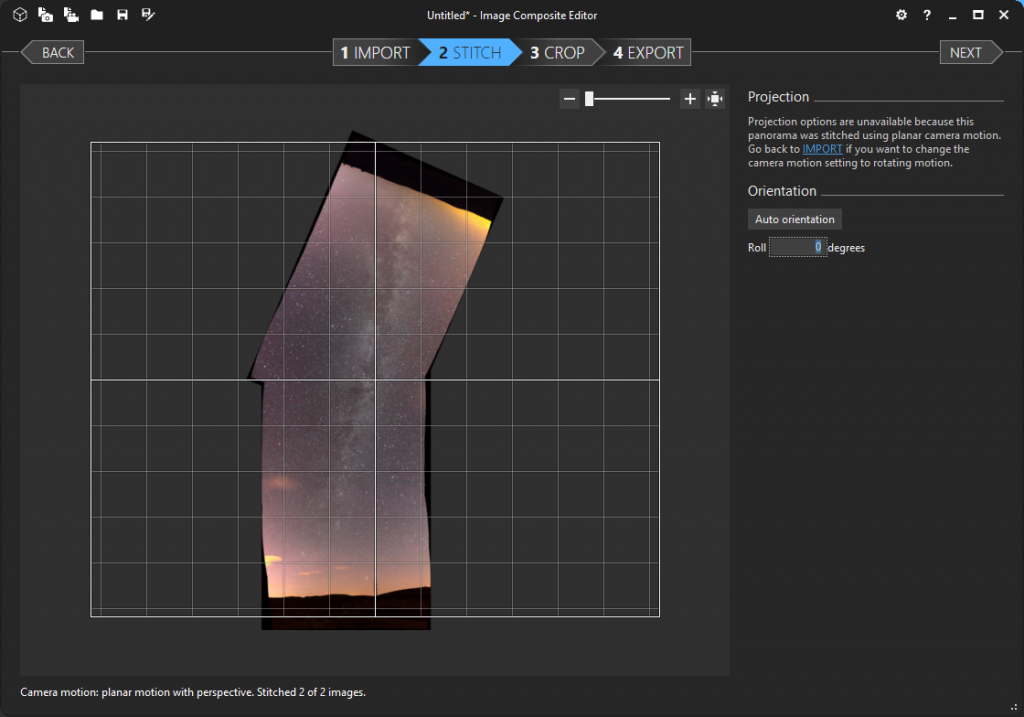
You can now use ICE to join these 2 halves to make a complete mosaic. Load them in ICE and Clicking Stitch will give you a result like this.

no roll

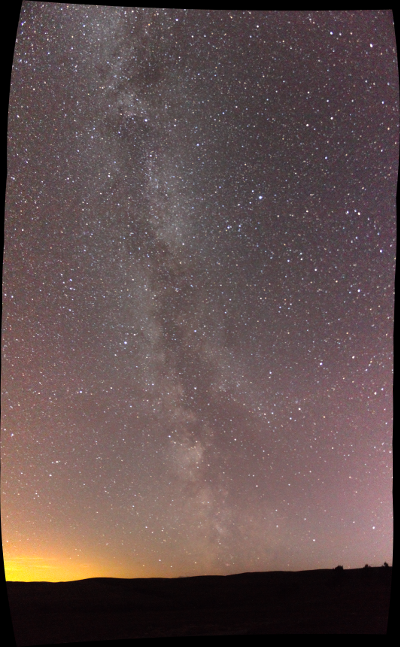
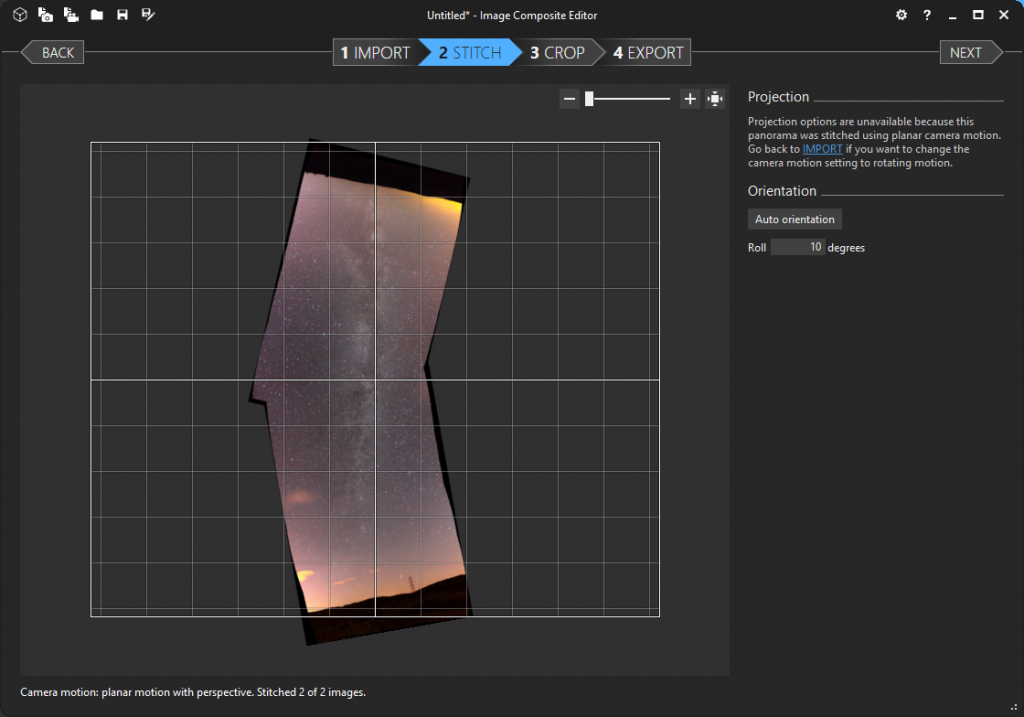
We need to rotate this a little to bring the Milky Way vertical so insert a value of 10 for Roll to give this.

roll

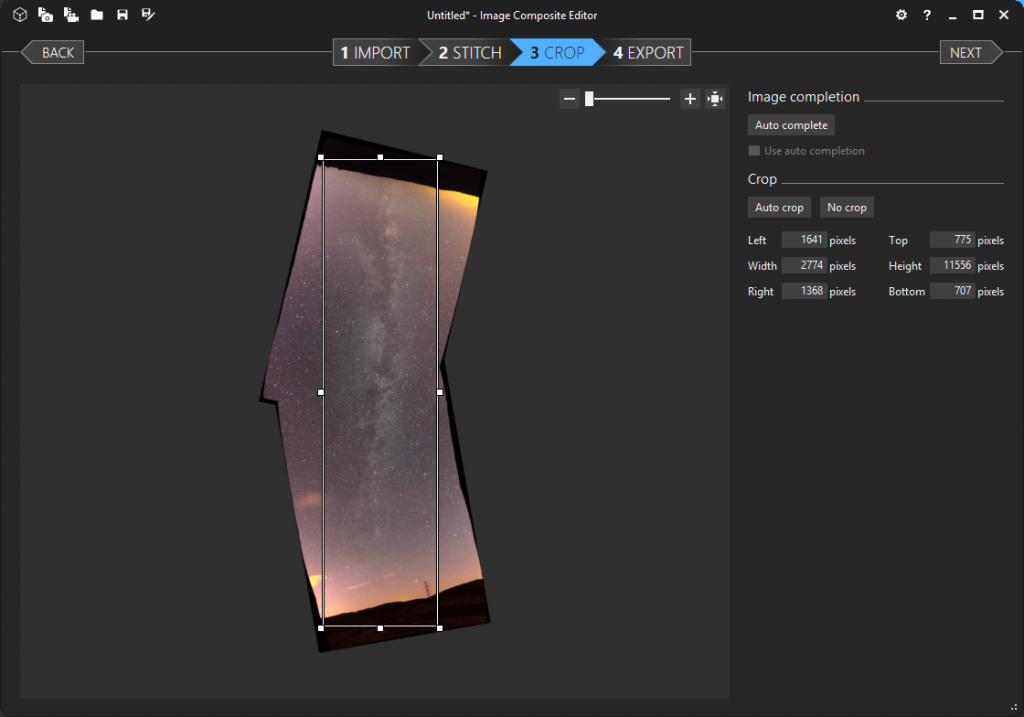
You can now click the Crop button and adjust the crop window to suit like this.

crop

You can now export this image and edit it in your favorite image editor.

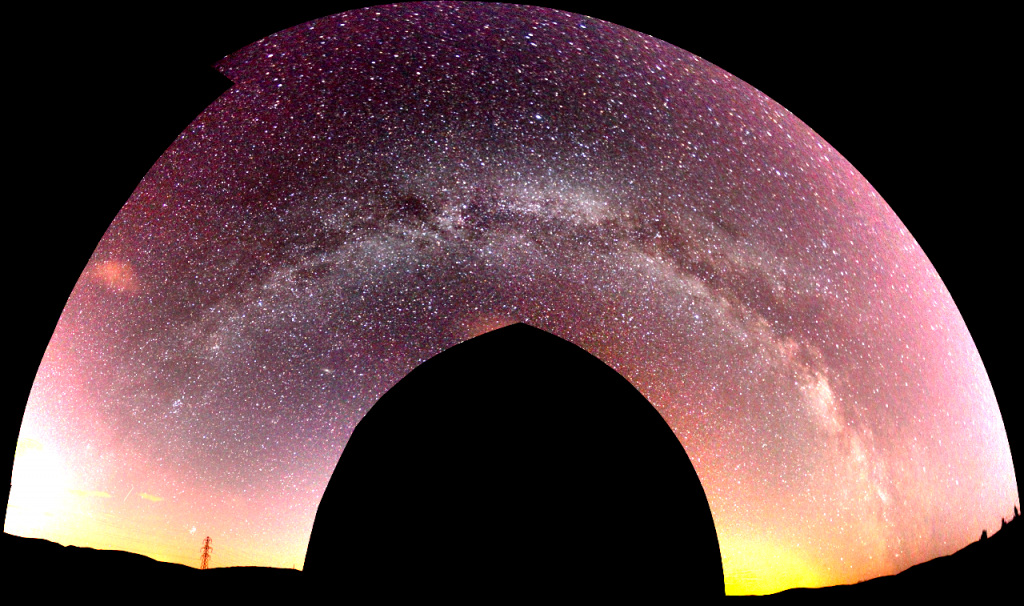
You can also load both sets of original images in and let ICE stitch them all together. Below is how this looks using the Fisheye projection and colors tweaked in Gimp.

IMG_5491_stitch fisheye scaled

Not bad for 10 minutes of field work?


 Posted by at 12:42 pm

Flash in Orion

 Deep Sky  Comments Off on Flash in Orion
Feb 172015
 

I was imaging Orion when I captured this shot. Still trying to work out what it was. It was taken from Inverness, Scotland on 16th February, 2015 at 21.04UT.

ufo 4se m42 30s 6400_0096 text

Below are some other shots I took the same night.

M42 using 300mm lens

M42 using 300mm lens

M42

M42 using Nexstar 4SE

Flame Nebula

Flame Nebula using 300mm lens

All images taken with Canon 1100D, stacked in DeepSkyStacker and processed in StarTools and Krita.

 Posted by at 1:06 pm

Alt-Az Orion Nebula

 Deep Sky  Comments Off on Alt-Az Orion Nebula
Feb 142015
 

I got a book on astrophotography for xmas and one of the things it said was that you can’t do deep sky imaging with an alt-az mount. I thought I would try it out and left my NexStar 4SE tracking M42 un-guided while I watched the football. My Canon 1100D recorded around 50x good 30sec exposures which were stacked in DeepSky Stacker and processed in StarTools and Krita to give the result below.

Click for full size image

Click for full size image

 Posted by at 8:55 pm

Cluster of Clusters

 Deep Sky  Comments Off on Cluster of Clusters
Jan 252015
 

Here is my first real go at capturing clusters with my Nexstar 4SE OTA and Canon 1100D combo on an unguided HEQ5 Pro. All stacked in DeepSkyStacker and processed in StarTools and Krita. Krita is very cool and easy to use and can handle the 16bit tiffs from StarTool. Lights and darks all 20s and biases 1/4000s, all at ISO 6400.

M46

M46

M47

M47

M48

M48

M67

M67

 Posted by at 3:02 pm

2015 Orion Nebula

 Deep Sky  Comments Off on 2015 Orion Nebula
Jan 232015
 

This is my latest M42 captured on my Canon 1100D thru a Nexstar 4SE OTA mounted on a HEQ5 Pro. Stacking was done in Deep Sky Stacker and Processing in StarTools. I know it looks very gaudy but I like it. To me, it looks like we are peering thru furnace clouds into the blue white heat of the stellar foundry within. There is even a hint of some Pillars of Creation type features around the blue core.

m42all good 90 ST

Pillars of Creation?

Pillars of Creation?

Image was composed of 189 lights, 22 darks and 23 biases. All shot at ISO 6400 with 20s for lights and darks and 1/4000s for biases. Mount was unguided.

Update

StarTools creator Ivo took pity on my processing efforts and produced the image below from my data. Talk about chalk and cheese. You can see his processing workflow here.

m42all good 90 with bias001 ivo cropped

 Posted by at 7:29 pm

DSSR Drift Alignment

 Deep Sky, Tutorials  Comments Off on DSSR Drift Alignment
Jan 202015
 

I normally keep my mounts poorly aligned to allow testing of DSSR’s autoguiding feature. However, I wanted to take some deep sky shots so thought I better drift align first. Drift aligning is done in 2 steps and you can use the Sun, Moon, planets or stars as drift targets.

First, setup DSSR looking at a target in the South (or North if you are South of the equator) with roughly 0 degrees declination and open the Autoguide window and its Graph window. Right click on the target (I used a sunspot) which will turn on the drift monitoring mode and watch how the mDV line drifts off the horizontal. Stop monitoring, adjust your east-west mount adjustment screws and start monitoring again. If the slope of the mDV line gets steeper you have adjusted in the wrong direction. Repeat this process until the mDV line is horizontal like this screenshot.

Screen 20150119112741 000397

Next, choose a target near the eastern or western horizon. Repeat the monitoring process but this time adjust the north-south screws on your mount to get mDV horizontal like below.

Screen 20150119112741 001405

You can see above that I over-adjusted and the mDV curve started to climb. I then had to adjust in the other direction to bring the curve horizontal. I am now drift aligned.

ps Make sure you set your scope rate to suit your drift target.

 Posted by at 10:22 am